Configuration
This section outlines the configuration steps required to integrate the Integration Hub module with the ASI 3 platform, enabling centralized management from ASI.
Pre-requisites
Before proceeding, ensure that you have at least one Integration Hub node (v3.1.0 or later) fully installed and configured.
For installation instructions, refer to the official documentation: Installing Integration Hub
Setting up Integration Hub
All actions in this section must be performed by the ppadmin user on the Integration Hub node.
To initialize the Integration Hub module, execute the setup script:
/opt/ISS/integration-hub/bin/setupIntegrationHub
This script will configure the necessary components to allow the Integration Hub node to communicate with and be managed by the ASI 3 platform.
Client Configuration
All actions in this section must be performed by the ppadmin user on the ASI 3 system.
To enable secure communication between Integration Hub and ASI 3, you need to configure a service client within the Authenticator module.
- Create the
Integration HubService Client
Run the following command to create the service client:
/opt/ISS/asi/authenticator/utils/addServiceClient integration-hub
Make a note of the client secret returned by this command. You will need it when registering the Integration Hub node with ASI 3.
- Assign Required Scopes
Grant the necessary permissions to the integration-hub client by assigning the following scopes:
- metric_publisher
- audit_publisher
- notification_publisher
Execute the following commands:
/opt/ISS/utils/addServiceClientScope metric_publisher integration-hub
/opt/ISS/utils/addServiceClientScope audit_publisher integration-hub
/opt/ISS/utils/addServiceClientScope notification_publisher integration-hub
- Retrieve the Member Join Secret
This secret is used by the integration-hub module during registration with the ASI 3 system. To retrieve it, run:
/opt/ISS/utils/getMemberJoinSecret
Be sure to record the join secret that is returned. It is required during node registration.
Setup
All actions in this section must be performed as the ppadmin user on the designated Integration Hub node.
Interactive Configuration
To register an Integration Hub node with ASI 3, use the registration script located at:
/opt/ISS/integration-hub/bin/registerIntegrationHubWithAsi
You will be prompted to enter the necessary configuration values.
Unattended (Automated) Configuration
The script also supports command-line arguments for unattended setup:
Usage: /opt/ISS/integration-hub/bin/registerIntegrationHubWithAsi [-a|--authenticator_url <arg>] [-m|--management_service_url <arg>] [-j|--join_secret <arg>] [-s|--member_secret <arg>] [--(no-)quiet] [-h|--help]
        -a, --authenticator_url: The authenticator can be seen through the load balancer or the direct address of the authenticator if not (no default)
        -m, --management_service_url: Where a management service instance can be located (no default)
        -j, --join_secret: The client secret to operate with (no default)
        -s, --member_secret: The client secret for asi-datahub (no default)
        --quiet, --no-quiet: Don't prompt for input (off by default)
        -h, --help: Prints help
Start the Service
Once registration is complete, start the integration-hub service:
systemctl start iss-integration-hub.service && tail -F /opt/ISS/logs/integration-hub/integration-hub.log
Validate
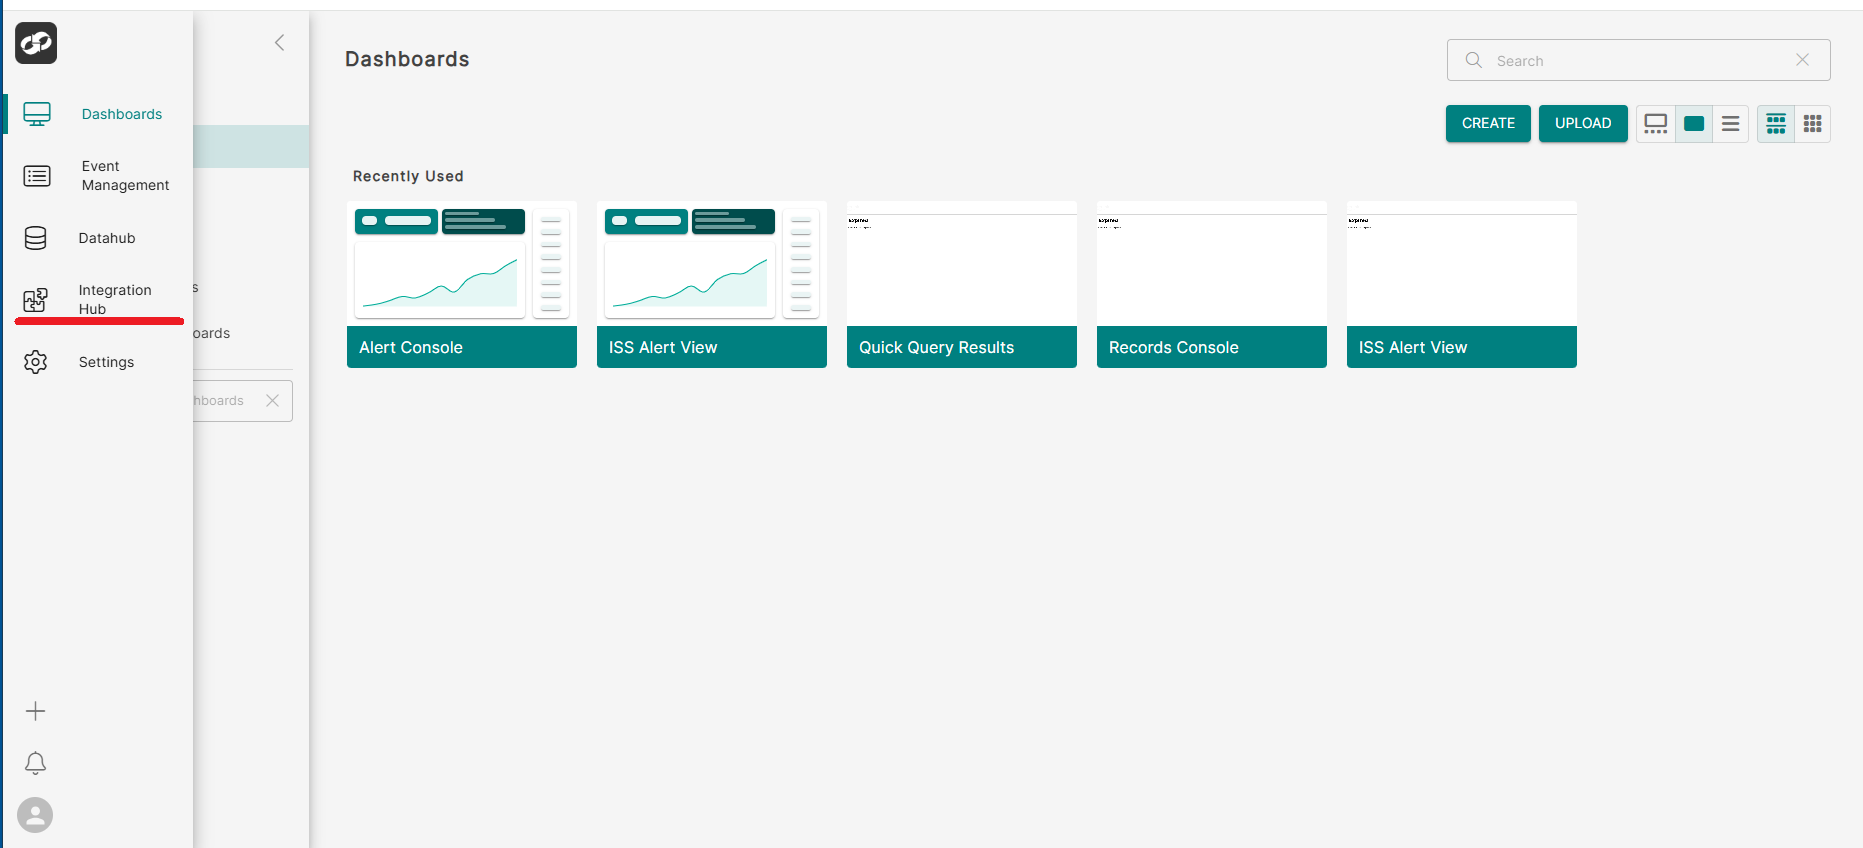
In the ASI 3 web interface, you can verify that the Integration Hub module has been successfully registered by confirming its presence in the left-hand navigation menu.
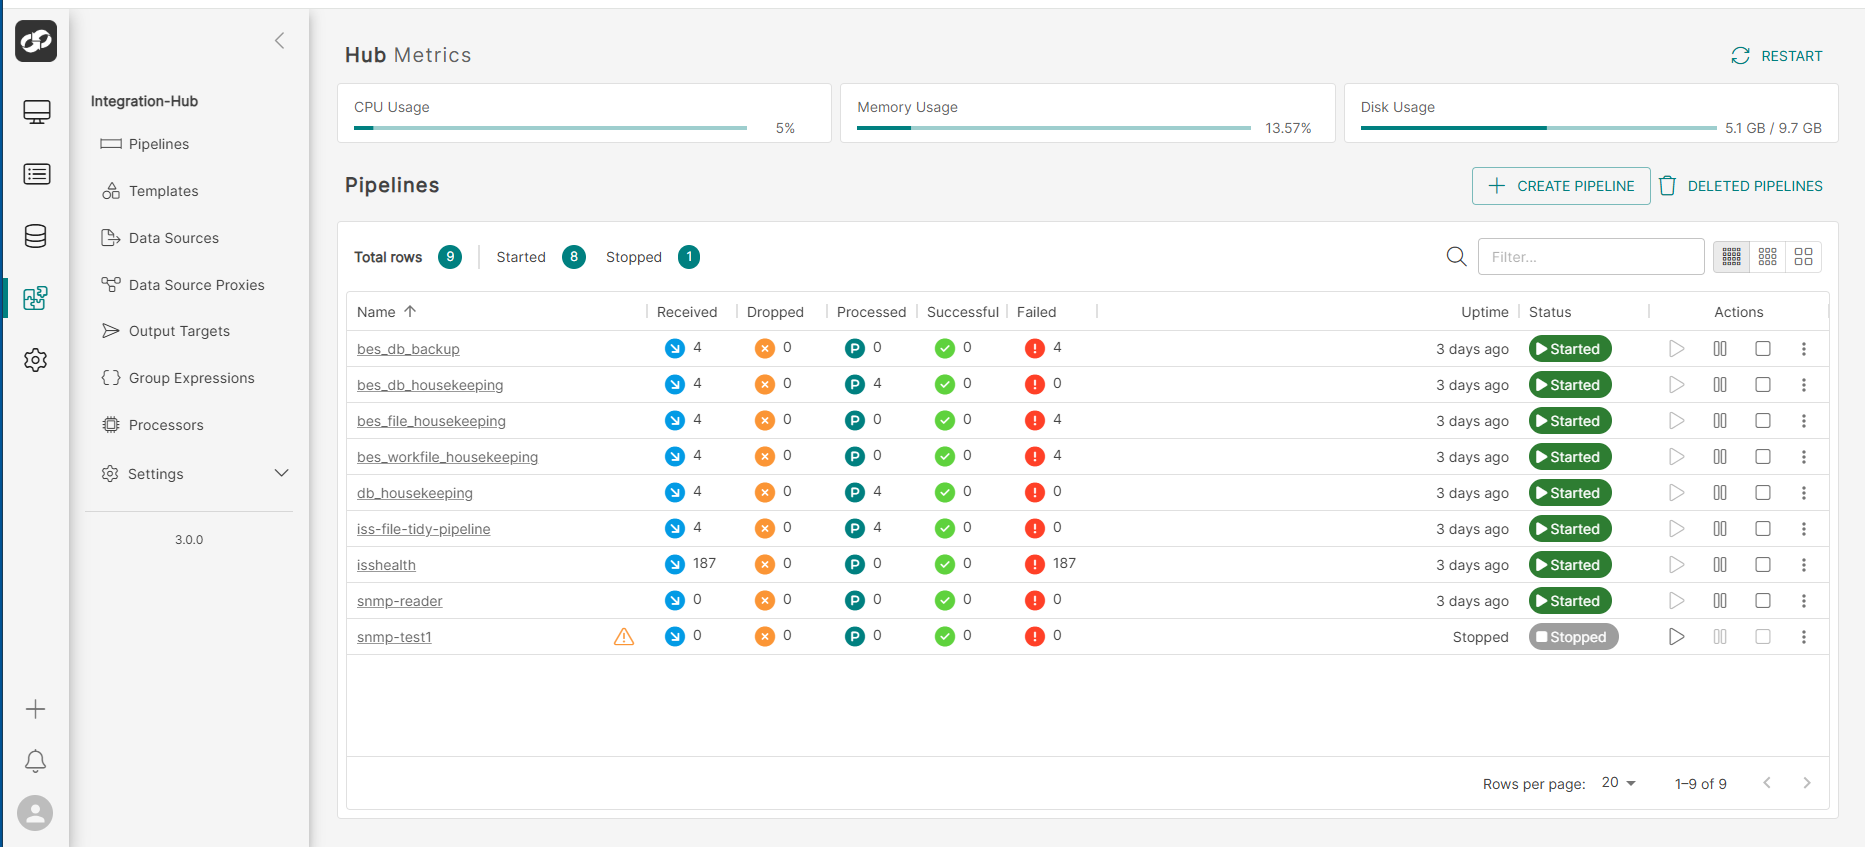
If you then select Integration Hub from the menu, you should see the configured Pipelines displayed: