Configuration
This section outlines the configuration steps required to integrate the DataHub module with the ASI 3 platform, enabling centralized management from ASI.
Pre-requisites
Before proceeding, ensure that you have at least one Data Hub node (v2.1.0 or later) fully installed and configured.
For installation instructions, refer to the official documentation: Installing DataHub
Setting up ASI DataHub
To initialize the ASI DataHub module, execute the setup script as ppadmin:
/opt/ISS/asi-datahub/bin/setupAsiDataHub
This script will configure the necessary components to allow the Data Hub node to communicate with and be managed by the ASI 3 platform.
First node / Single Node Setup
Login to your asi3 system with administrator privileges and click the Add Capability icon and select Datahub.
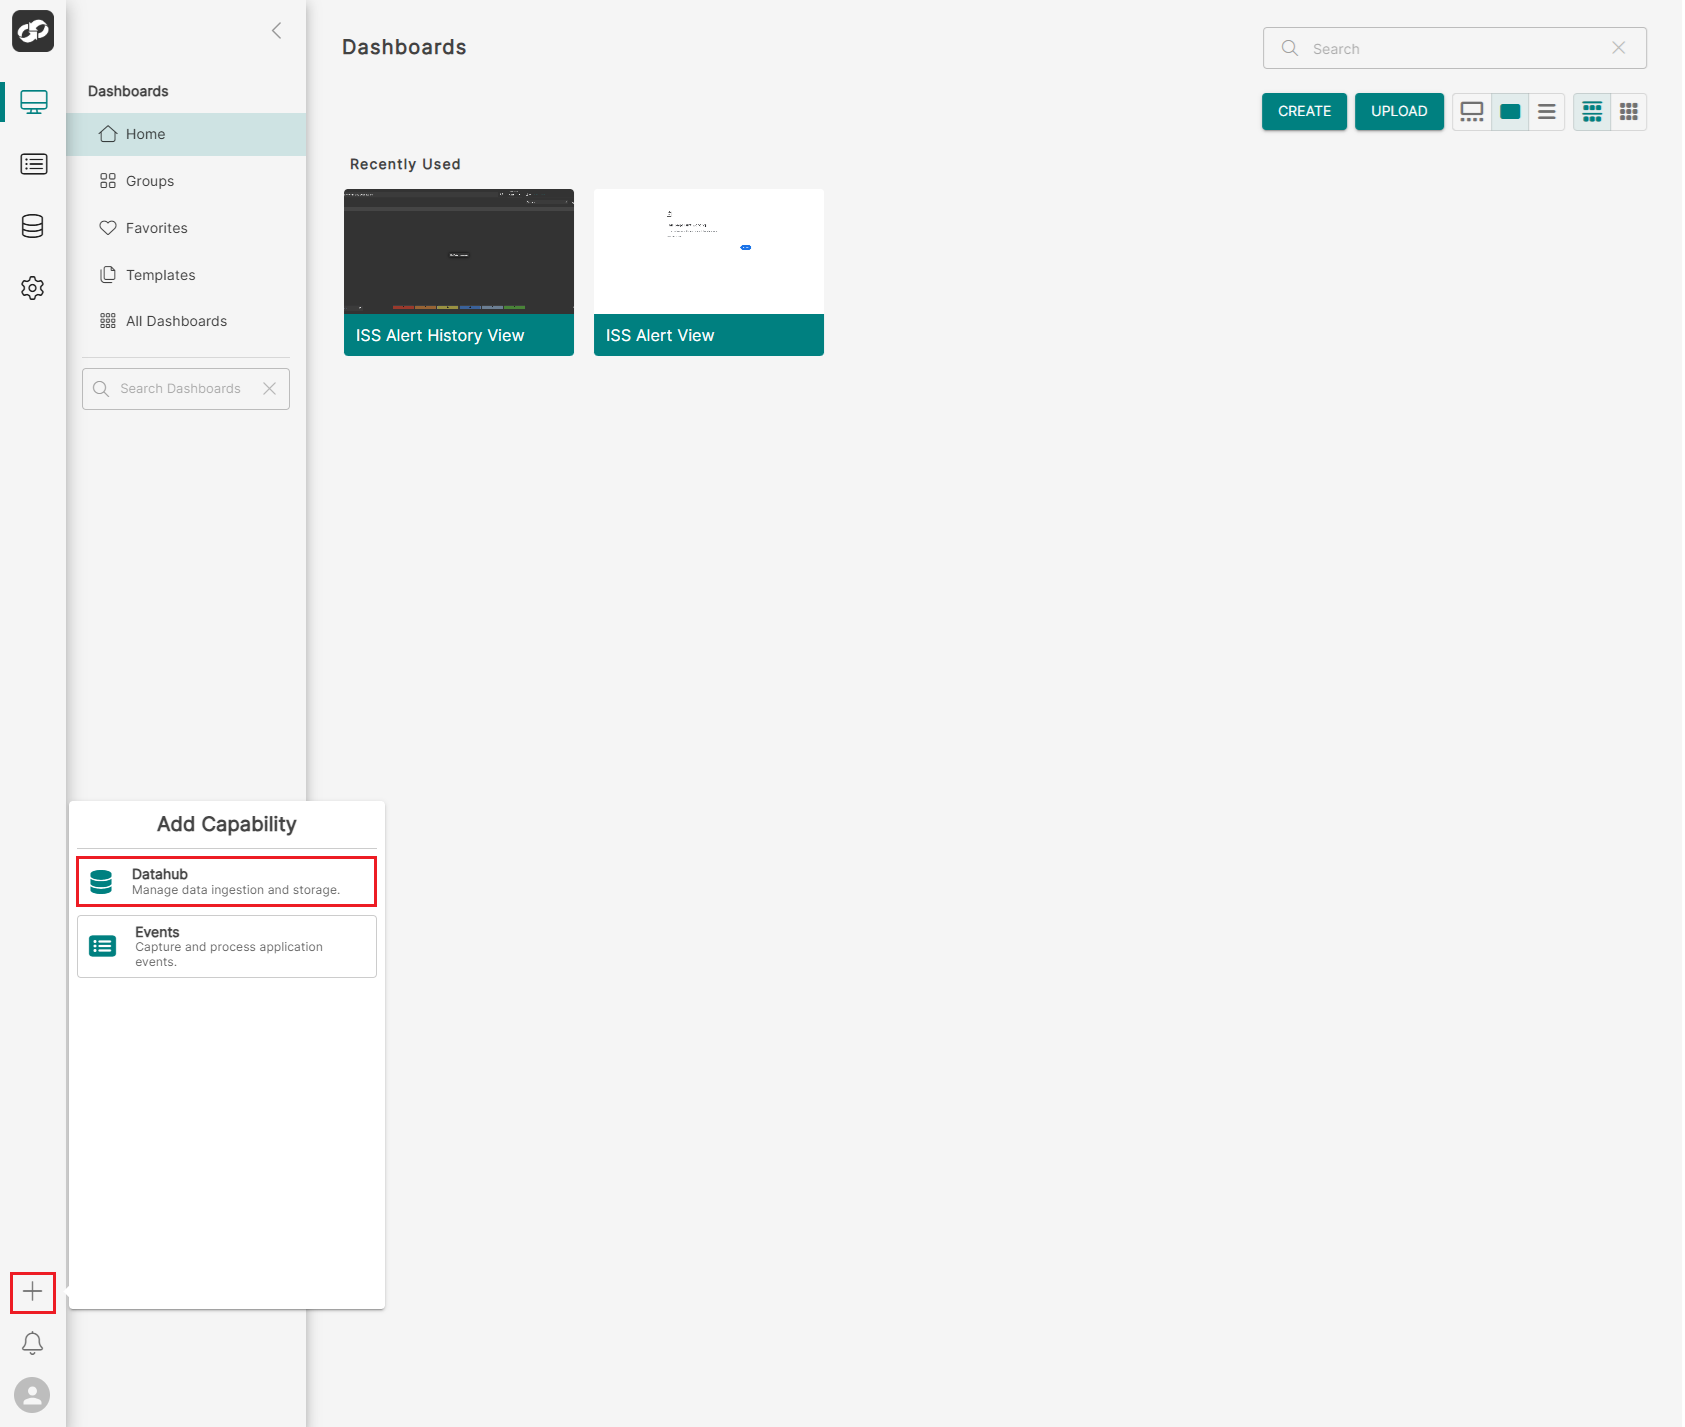
This will generate the registration command for your Datahub instances. Click copy to store this into your ClipBoard.
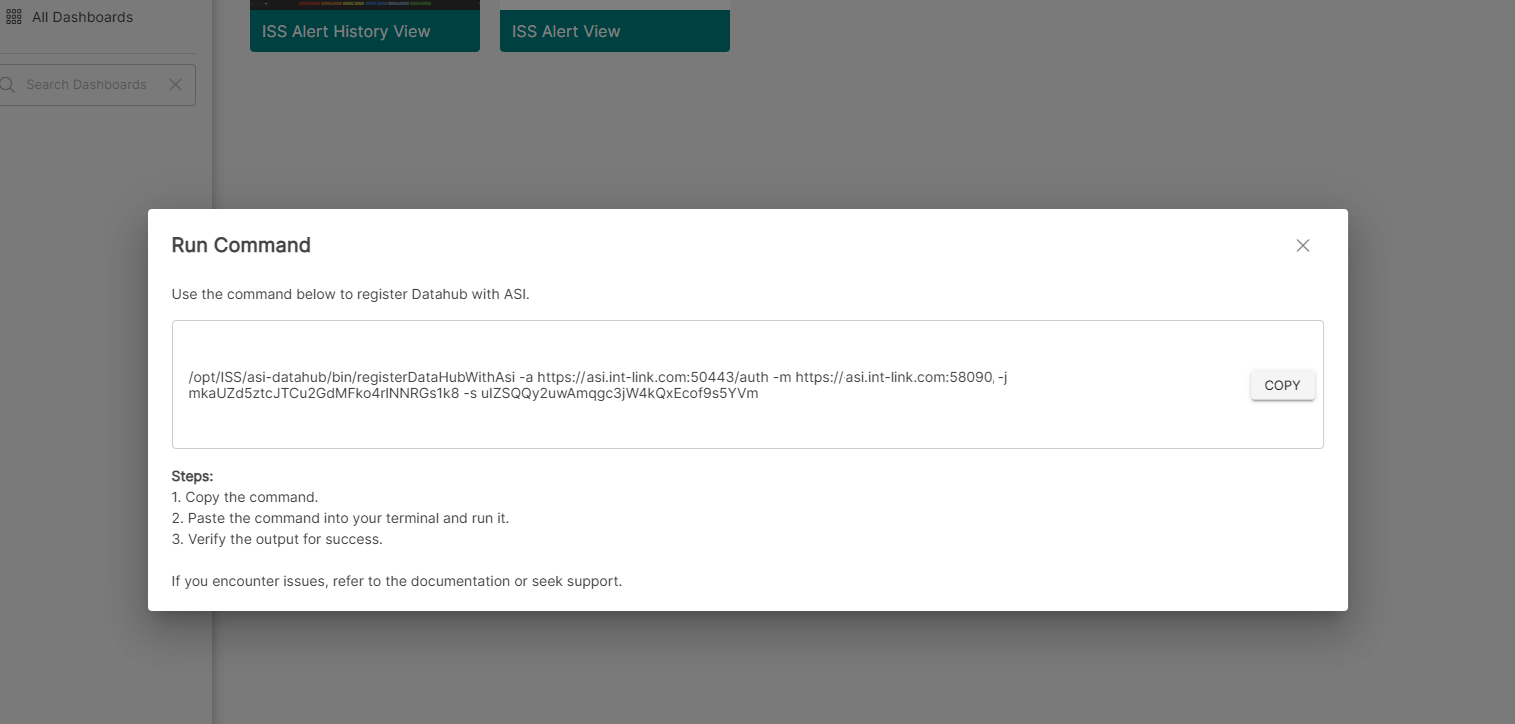
Login to your Datahub server with a ppadmin session and paste the generated command, this will register the Datahub node with asi3.
/opt/ISS/asi-datahub/bin/registerDataHubWithAsi -a https://asi.int-link.com:50443/auth -m https://asi.int-link.com:58090 -j mkaUZd5ztcJTCu2GdMFko4rlNNRGs1k8 -s uIZSQQy2uwAmqgc3jW4kQxEcof9s5YVm
Start the Service
Once registration is complete, start the iss-asi-datahub service:
systemctl start iss-asi-datahub.service && tail -F /opt/ISS/logs/asi-datahub/asi-datahub.log
Add a Node to an Existing ASI 3 Cluster
All actions in this section must be performed as the ppadmin user on the designated Data Hub node.
Interactive Configuration
To add a Data Hub node to an existing ASI 3 cluster, use the provided cluster join script located at:
/opt/ISS/asi-datahub/bin/joinAsiCluster
You will be prompted to supply the required configuration values.
Unattended (Automated) Configuration
The script also supports command-line arguments for unattended setup:
Usage: ./joinAsiCluster [-a|--authenticator_url <arg>] [-m|--management_service_url <arg>] [-j|--join_secret <arg>] [--(no-)quiet] [-h|--help]
        -a, --authenticator_url: The authenticator can be seen through the load balancer or the direct address of the authenticator if not (no default)
        -m, --management_service_url: Where a management service instance can be located (no default)
        -j, --join_secret: The client secret to operate with (no default)
        --quiet, --no-quiet: Don't prompt for input (off by default)
        -h, --help: Prints help
Start the Services
Once the node has been successfully registered with the cluster, start the required services:
systemctl start iss-datahub.service
systemctl start iss-asi-datahub.service
Validate
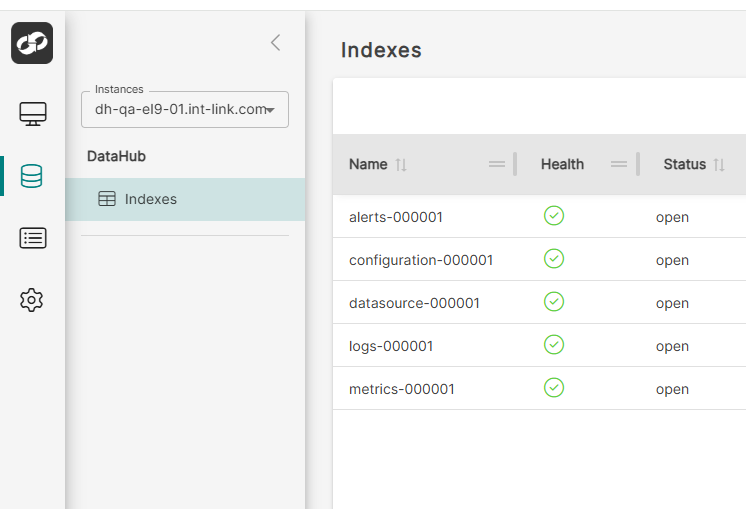
In the ASI 3 web interface, you can verify that the Data Hub module has been successfully registered by confirming its presence in the left-hand navigation menu, you may need to perform a refresh of your browser.