Create OIDC Authorization Provider
The following section covers how to setup an OIDC authorization provider for user authentication
Log on to ASI and navigate to Settings
From the index on the left, select Access Management then Authorization Providers
You will then be presented with the Authorization Providers page

- Click the
CREATEbutton in the top right of the page which will bring up an option list of provider types. - Click
OIDC
You will then be presented with the Create Identity Provider page
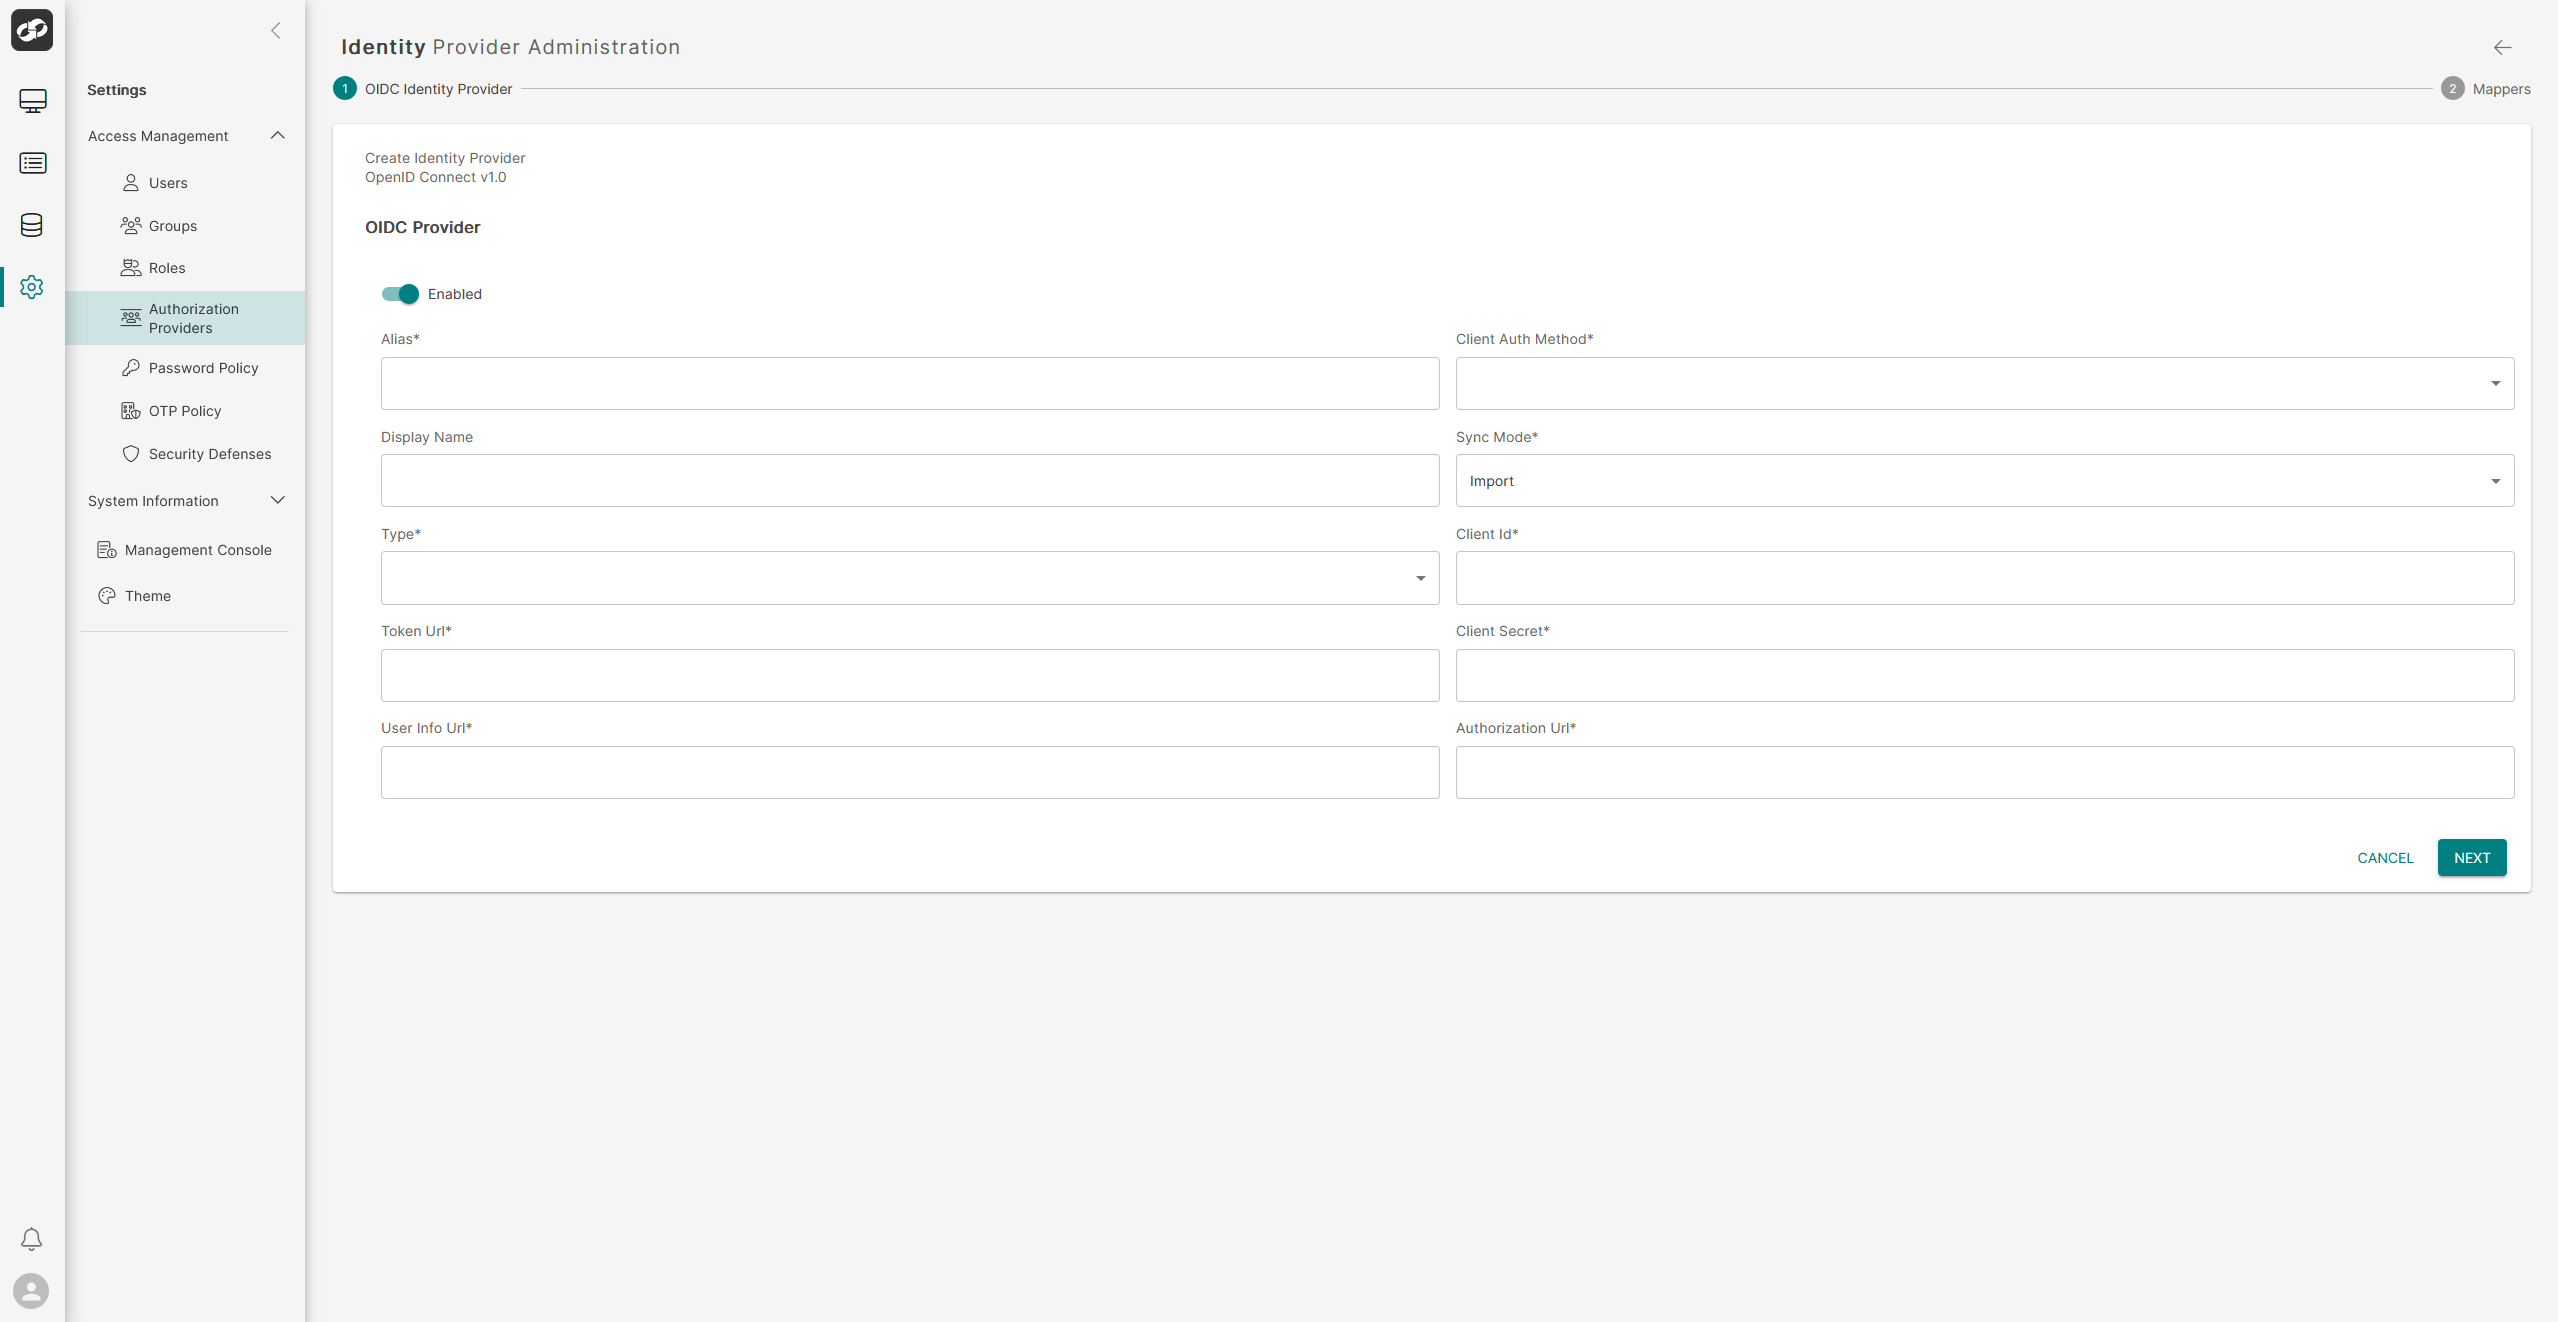
Define the attributes for OIDC authentication
- In the
Aliasbox, enter the alias for the authentication - Check the
Display Namebox, enter a display name for the authentication - In the
Typedropdown, selectOIDC - In the
Token Urlbox, define a priority (zero by default) - In the
User InfoUrl box, enter the URL for User Info - In the
Client Auth Methoddropdown, select the appropriate authentication method - In the
Sync Modedropdown, select the appropriate synchronisation mode (ImportLegacyorForce) - In the
Client Idbox, enter the Client Id details - In the
Client Secretbox, enter the Secret for the Client Id - In the
Authorization Urlbox, enter the URL for authorization - Click
Createto apply the new authentication